Sunday, May 4, 2014

Caminito - II

This week I'm going to carry on with the Caminito - the one drastically in the middle of progress. I think this work is going to go well with the summer coming and all, hopefully it's going to be nice and summary to get us all in the mood for a holiday. Right? 

Below you can see where I was left off and from which I will carry on during this post. All is simple, all is still under the whole molding process and ready to be worked on. So let's get to it, shall we. 


From here I just keep on going in the same lines of just shaping the work to its future form before any detail is added and I hope to get a start on some shading. There's a lot I want to reshape on the building such as the left side of the building,  the trash can and some of the street lights. I'm going to add another blue street light on the right side of the building behind the red pole, just to bring some action to the right side too since the left side will be quite full in my vision currently. 


After doing this, I want to make a head start on the pavement on the road, just to distinguish that it's not just a hazy brown.. concoction. I'm also going to reshape the balconies and the green doors there, their dimension don't seem to fit to the rest of the building. 


As I did all of the mentioned above, I took the liberty to add some detail to the left side of the building, drawing some starts of the trees in the background and mannequin legs below the red signs under the balconies. I also darkened and lightened the pavement slash road with a new layer and a large brush - just to bring out some contrast with the magic of shading. 

As the last thing for today - because I haven't had enough time to really work on this than on this very Sunday today - I have a trashcan to fit on the left side.. A pickle some might say. 


...Soo, I set on a mission to make a trashcan and that is exactly what I did. A job done right there. Now I know I haven't actually done much this post, other than a few biggish changes (for me that is) and so I apologize for that. I can say that I believe the picture is shaping to be somewhat along the lines I'm looking for so next week I'll have a piece I'll be looking forward to work on. The beginnings are always a bore, in my opinion.

Next week I hope to start on the trees on the right side, it looks so bare as it is and it's very difficult to do such fine work with the big brush I'm using at this stage of the process. I can see in the not so distant future that I will be able to decrease the size of my brush and start on the real work of detail. I guess that's all for this Sunday then and 'till the next one. 

Sunday, April 27, 2014

Caminito


Time for a new project! I was looking for some kind of inspiration today for my new work and I found this great photograph of a street somewhere in Argentina and thus I decided to whip up some kind of a colorful and soulful street, as a change. 

This time I'm trying out a bigger image size, more like a poster type of thing with dimensions 40x50 cm and with a DPI of 300. This will increase my image quality and size - just in case. I've started with a 2B pencil and i just sketched the outlines of my street corner on a darker shade of gray. 


Throughout this post I'll be in the simple zone, it took me so long to find inspiration for a work and so I could only work on it for a few hours today. Anyway, after being finished with my sketch I started doing the foundation work with black and white - all simple and with a big brush. 


Now that I have my black and white foundation settled, my work is ready for color. I wanted a some sort of pinkish-purple sunset in an otherwise blue kinda thing going on in the sky with a little cloud action of course, which I'll start working on before starting on the building itself. 


I've got some sort of background going just as a starting point for my sky, I'll come back to it later on. Now I can start blocking in colors still using a large brush with high opacity, keeping it simple. 


The work looks like something a 10 year-old made at school right now since I haven't really gotten in any detail what so ever, hopefully better luck next week. Ha ha. I really do wish I would've had more time to work on this - I guess you get the gist of it. Next week I'll be adding shadows and hopefully start on more simple details. So 'till next Sunday then!


Monday, April 21, 2014

Tractor Bob - Finished

Happy belated Easter!

This Monday evening serves for my Sunday evening this week, since it is my last day off before starting up the school week again and Easter Sunday was way too busy to be posting anything.. I hope I'm not throwing anyone off with this drastic change. This week I've managed to finally finish Tractor Bob as you probably figured out from the title and all I can do now is to walk you through the progress 'till the end.. 

Here's the mind-jogger: 


From here onward I'm going to start on the background, add texture to the block of flat and all in all just pull everything together once again by decreasing the size of my Airbrush. At this point, I also like to pull out a special and very handy tool called the Blur tool, which I have noticed to help a great deal when working on backgrounds. 


Above I have dabbed about on the side of the block of flats to achieve a brick wall effect and then adding a layer and decrease the opacity by half - then, smooth out the dabs so that they blend together slightly while keeping the brick wall 'graininess'. I've also added a subtle twirly in the sky, just to bring about a surreal touch to the image to sort of bring it all together, I felt it was a bit boring up there being all white.. I don't want to darken the twirl anymore than it is now so that it doesn't draw too much attention.


 After being done with the background, I refocused on the body of the tractor, adding texture with some wear and tear all around. Oh, I also added two little tree branches behind the character's legs, just to sidestep the background a little. If you compare the body of the tractor to the image on the left and the image below, you can see the difference of texture on the body. 


I wanted to keep this 'painterly' look to my image instead of a realistic touch which is why I chose to execute the texture of the tractor body by long brush strokes. This was not a planned action, I just felt as though it worked well when I zoomed out and sure enough it worked well to my eyes and so I just left it there. It's almost an unfinished look, if you will. 


Now that my tractor body was just about finished, I just did the same with the upper half of the tractor - slowly pulling everything together until I felt it was detailed and finished enough to suit my needs. Below you can see the work done on the top, nothing extraordinary just little tweaks here and there.  


Well, what can I say now.. For the past few hours I've just been fiddling around here and there, adding little details where I felt they were needed until I felt everything was falling into place and I was ready to present my finished work. I have to admit, I'm not too happy with the background block of flats or - the background at all - but at the same time I've been struggling with it all day and I don't think it will get much better than that. Maybe my next block of flats will look better, who knows!

And to finally get to my finished piece of work....Drum roll please...


.... Aand voila! As a last reflection on Tractor Bob I'll have to say I think the grim look works well with the work, if I must choose something that I thought worked out. As I said earlier, the background would have needed more work but due to my impatient nature, I've decided to let it go... For now. Otherwise, you can make up your opinion about it, I'm just going to leave it at that. 

That's all for this week then, next week I hope to start something new once again, I haven't got the slightest clue of what it is yet but I'll be sure to come up with something. 


Sunday, April 13, 2014

Trucker Bob - Part II

Happy Palm Sunday!

In this strange little land called Finland we have this annual tradition among the little kiddies much like the Halloween 'trick or treat' tradition in the United States that the little ones get to go door to door in different costumes and sing a little song in order to fill up their baskets with Easter candy - a little warm up for the candy fest that follows next Sunday on Easter itself.. And speaking of Easter, I was kindly asked to make some kind of nice 'home made' card for my relatives in the US and thus, I've been quite busy in the spring chores this weekend. 

On a non-Easter related note, I've also been busy this week on my free time with some sketching which has been on my 'request list' by a friend for awhile now so I've gotten a start on it which you can see below. 


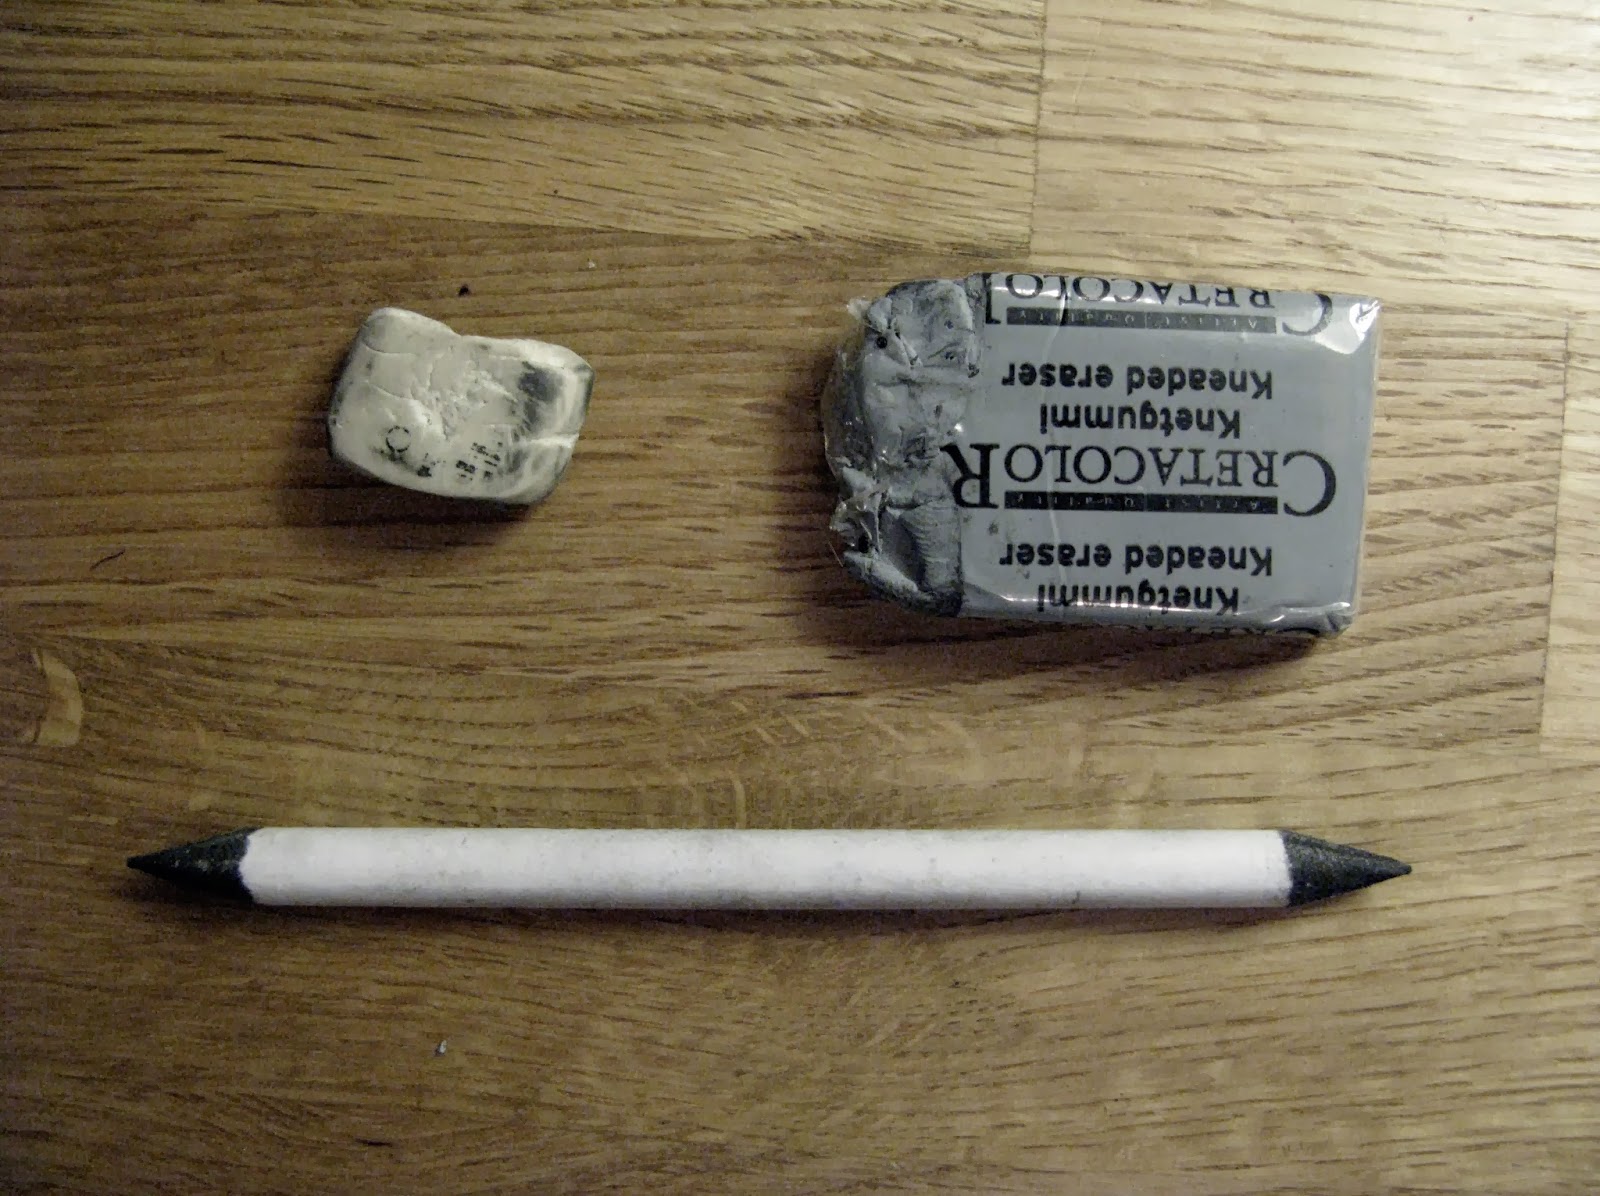
 Only after I began working on this did I find out that afros are more difficult to draw than they may seem. I have been struggling with it for some time but I do think I will make it at some point.. Starting on this portrait was also difficult and I don't have the slightest clue why. However, to draw this portrait I've been using my trusty graphite pencils and of course I started with a light pencil to make the outlines and then just worked towards darker contrasts as I went. I also use the 'paper' blender, a very handy tool when it came to

  the afro - it's difficult to get even dark tones without using an endless amount of time to achieve it. 

What I do really enjoy to use is the Kneaded Eraser, because you get such good results with it; it works for any kind of lightening you want to achieve and it's just a necessity to every sketcher's tool box. 


Now, to get to my current digital arts project; Trucker Bob. Last week's recap is shown below:


What I want to do next is to focus on the tractor's tire, mostly just to add depth and texture. I don't want to get on with the tractor's body just yet because its just a massive undertaking and I haven't had enough time to fully focus on it this weekend, unfortunately.

So, in order to focus on the tractor tire I've taken the liberty of zooming in now as with the character's face and along with the zoom I decrease the size of my Airbrush and well my friends, dig in. At this point it's good to increase the opacity of my brush, so that I can achieve that grainy look that tires tend to have instead of a smooth surface you can see on the image above. 


I still just cannot figure out why my screen shots are occasionally brownish like the one on the left.. A great mystery indeed, its a shame I'm not too big of an IT or computer nerd.


Sepia screen shots aside, above you can observe how I've added quite a bit of texture to the tires, perhaps even too much for my taste but that is all in the plan for now as you see later I will come back to it and go over it once more with a light brush which will smooth-en out the texture, leaving just a slight grain that I desire. Though, for now we will leave the tire alone for a short while and get back to the tractor body. I want to start bringing in the lines and making the whole body sharper since you can start to see how it looks significantly more blurry than other parts of the image that I've been working on - except maybe the background.

Due to some complications with my software, I haven't been able to continue much further today without the help of my computer guy. I'm really experiencing a lot of computer issues these days aren't I.. Anyway, I managed to get a head start on the tractor's body, mainly the headlight area above all. I've been trying to make the rust effect look real but since it's my first time.. Always a good excuse.


Here you can see how I've kinda just began on the details around the headlight, not too specific with the coloring but we are getting there - slowly but steadily.. I believe this will be the most difficult part of the work, since I don't have too much experience with cars nor rust making. I guess I will have to leave the rest for next week since I'm running out of time.

To recap today's work, here is where I am left off now with Tractor Bob.


Well, I guess it will just have to be the recap in a Sepia tone. I give up..  I do admit, there is not too much of a difference to be seen, but the detail phase is always the longest one and the difference will most definitely show at the end when it all ties in together. Next week - I may not be able to post on Easter Sunday but I will give it my best effort - tune in to the (hopefully) finished work of Tractor Bob. 

Sunday, April 6, 2014

Trucker Bob


As I said in my last post, the passing two weeks have been hectic ones which have left me with very little time to work on my projects other than at school with my lengthy skip-lessons. Most of my creative work has been aimed at just sketchbook work when an occasional free moment occurred - and I tell you even that was rare. What can I do, we will just have to work with the time we have, don't we?

With the quick start I managed to make on Tractor Bob on the last Sunday post, below is the mind-jogger for you. 


So, essentially I was left off at the basics. From here I just press full steam onward continuing with no zooming into the nitty gritty detail until I say otherwise. Ha. Instead of zooming in, I decrease the size of my paintbrush as I go along. Below you can start to see how my original sketch marks are just about vanished from the image and how the image is more pulled together and less hazy, if you will. 


I've added quite a bit of detail to the character itself - haven't got to the face yet, they are always a wee bit tricky - but instead on the clothes and hands. The tire and body of the tractor are coming along, I'm still on the process of making them look weathered.


On the image above I have added a bit more detail onto the background, just a fielding work which I will probably want to haze out later on. I haven't put too much effort into it, I only began working on it because it was bugging me being all flat in the background before.


From here on I thought I would put some more time into the character itself, mainly onto the face and hair area. I zoom in, decrease the size of my brush and increase the opacity and dabber away at the face for the next hour.


And voila! An hour well spent. However, at the moment, I'm quite puzzled.. I do not understand why my screen capture above is so yellowish, when the others aren't.. My computer seems to be acting up, so I apologize for that one.. I guess we will just have to survive with the yellow picture this time.

Anyway, after an hour of work, I managed to pretty much finish off the character at play here as you can see above. I faced quite a bit of difficulty with the face, mainly making it look something like Bob Dylan. Maybe I should have been listening to his music instead of jamming to the Black Keys.. Otherwise I believe I've survived quite well and next time I can begin finessing the background and the tractor. I admit that I am not looking forward to the tractor, it's still very much out of my comfort zone - unfortunately. Ah, I would love to have the necessary experience to draw one of those old 1950s cars.


...And here is where I am left off now, in full. I do think I can say this Sunday has been quite the productive one, at least in my case. Next up is the tractor and the background, a full detail session to come. Well, I hate to say it but I guess that is it for me for today. All I can say is 'till next week then, keep sketching!

Sunday, March 23, 2014

Finished Sleepy Dog Among Other Things


This week I finally finished the notorious Sleepy Dog and incidentally I also embarked upon another subject to be heard about more later on. I've had some extra time this week and I thought I would use it to my advantage since for the next few weeks I will be utterly swamped with other work meaning that I may make slow progress from then onward. Well, I guess there's no change there to the usual. 

Just to start things up below you will see where I was left off last week and whereabouts I will begin explaining this week. 


Here we go. The first thing I conquered was the table top, this time with a fierce attitude of 'I want to be done with this' and so, finally I had some progress made. Not to say I'm too happy with it but to be honest, I was getting a little antsy to start something new. Anyway, to do the table top again I took up a new layer and decreased the opacity of the layer to about half and brought up the opacity of my Airbrush to about 20-30%, which gave me nice sharp lines which would indicate the surface texture of the table. After doing this, I dropped my layer and opened a new one, again decreasing my layer as well as my brush opacity to about 20% and 5% respectively this time and added some depth to the whites and the darker grays to give a little punch and a glare effect. Below you can see the difference of the two table tops. 


I'm not too happy with the tabletop but I just couldn't continue this project anymore and I thought that it would not be the focal point which means that after a while, I won't pay too much attention to it any longer. Hopefully. Anyway, after finishing the last 'major' point in the image, I began working on some details like the coffee pouring out of the pot and some other minor aspects around the dogs face and paws until I felt that the last thing needed on this image was my signature. And so, I present to you my final work...


And la-de-da! A finished work. I feel almost embarrassed showing you the original sketch of this project again... I did not put too much effort in that one, that's for sure. Anyway, all in all I liked this project since it was nice and simple with a little edge to it. I do have to say that I'm particularly happy with the background if not with the table or the dog. I still struggled with the paws for awhile, trying to make them look authentic but now as I look at it, I guess it works just like that with a painterly touch to it. 


Now, that the Sleepy Dog as over with, we can begin on something new and exciting. I've been searching around for the past few days for inspiration and I got caught between two pictures of famous contributors to the music industry: Bob Dylan and Jimi Hendrix. I'm a huge admirer of both men and I thought I could find some interesting images on both of them - which indeed I did. On the left you can see Bob Dylan on a tractor, which is the image I went with eventually and not because of Dylan; because of the tractor. I got this idea that I will color in the tractor with a greenish-blue color giving it a nostalgic look with a little color splash if you will. 


I started up with re-sizing my image to 2000 x 2500 pixels and my DPI (dots per inch) value to 300 (doubled from the standard), enabling a good resolution. Again, keeping it simple I sketch the outline of the figure to get a rough idea for the blocking in part of the process. 


Here I have blocked in a rough set of values, ready to add some color to the tractor body. I've set my Airbrush to opacity of  32% to get a nice rounded end and size to around 25. By doing this, I can make a rough estimate of my work and fill in the necessary detail for this phase.

 I admit, I didn't get much further than this due to a shortage of time and it was coming to a time that I had to do my weekly update for you guys so that left me to the point that I got some coloring done and a few larger details here and there. 


Here I've just added a bit of color, rust and wear to the body of the tractor. Now, just to let you guys know I am not going to copy the image strait off as you can see with the coloring, just because I don't really enjoy doing that sort of thing. I've just used the image as a reference, I also use other images to get some parts correct like glares or parts of the tractor I'm not too sure about. In the original picture you can't really tell that the tractor would be a rusty old machine and I really wanted to have that effect in this picture, which I've started doing by adding browns and grays onto the greenish-blue color.

At the end, I don't really want the color to pop out like it does now but instead I've visioned it to shine through with a subtle grace between the shades of grey. However, that must be it for now - this week was a exceptionally long post I suppose - tune in next week to see more progress with Bob & the Tractor. 

Sunday, March 16, 2014

Sleepy Dog - Almost There

Still working on the Sleepy dog... I know, I know it has been taking me forever like any other project but I do have a eligible reason I assure you! I have been incredibly busy with my school work and other things which happens to be my excuse for this week's slow progress. I am not just slacking off twenty-four seven believe you me!  Anyway, I'll go straight to the point without wasting anyone's time; below is the mind-jogger for ya's of the progress I made last Sunday with the Sleepy Dog project:


I was pretty much left off on the table, which I continued to struggle with pretty much all day today - and still with unsatisfying results. You can imagine my frustration. After struggling for an hour or so, I decided to start over the whole table top idea, which meant getting rid of the little sparks since they don't seem to do it for me this time. As my second  try, I just tried to approach the table again with a simple eye and not focusing too much on the smaller aspects but to get the glares and shades correct which incidentally took me long enough led alone the details. 

After simplifying my table top I went deeper into the detail on the background, coffee pot and the dog itself, adding a fur-like texture to it as I went. I darkened the coffee in the coffee pot with a solid black and added some texture to the wooden boards on the wall with a smaller brush-size (using the Airbrush)


 I can't say I'm too happy with the outcome of the paws, I wanted them to look more rugged instead of a clean, non-realistic look that they occupy now. I guess I will have to tackle them again later on, I cannot focus on one thing too long without good results. What I do have to admit is that I got so frustrated with the table top that I just have to take a break from it for awhile. I have literally tried everything: new layers, textures, brushes you name it I've done it. I just cannot understand why it is so difficult, maybe I'm just out of practice or something along those lines. 

Now that I was getting into the groove in a sense, I managed to pull in the lines on the coffee pot which means good bye blurry lines! I also got to do a bit of work on the hand (pretty much that now you can now actually distinguish it as a human hand) and I added a little detail onto the backrest, particularly in the left corner. I decreased the size of my brush to around 2-3 and added a few creases to the leather pillows to give a signal if you will of wear and tear. I have to say, there is not much left for me to do other than petty detail and I will be finished with this work.. Finally! 


Above you can see the mentioned progress on the pillow, coffee pot and overall compared to the first image, everything is more tightened up and working together as a whole. It may not seem like I have done much but I assure you, it takes the longest to do the finer details. Again, I've been using the Airbrush throughout this project - don't ask me why I just have a keen attachment to it - and it works quite well. It's difficult for me to identify when this project will be finished because I can always see some petty little faults in here that I just can't get over with until I get so unbelievably bored with the project that I have to start something new.

 I am almost there just bear with me for another week! So close but so far.. My last task now is to finish the table top and touch up the paws and I will be D O N E! Next week I hope to start something new, so we have that to look forward to.